



















Instructions to connect
To start a conversation in Veyra, two people add each other by invitation. There's no centralized account: your profile, keys, contacts and history are stored on your device.
It's important. Do not publish an invitation or QR code openly. Before making contact, check the profile ID on the independent channel in person, by phone or during a video call. Unexpected applications are better rejected or blocked.
1. Download and install the app
Open it up Loading page, select your operating system and processor architecture, then install the app in the usual way for your platform. It is desirable that both participants have up-to-date versions of Veyra.
On the phone: At first launch, the system can request permission for notifications, a local area network, a camera or a microphone. I need a camera to scan QR codes, a microphone only for calls.
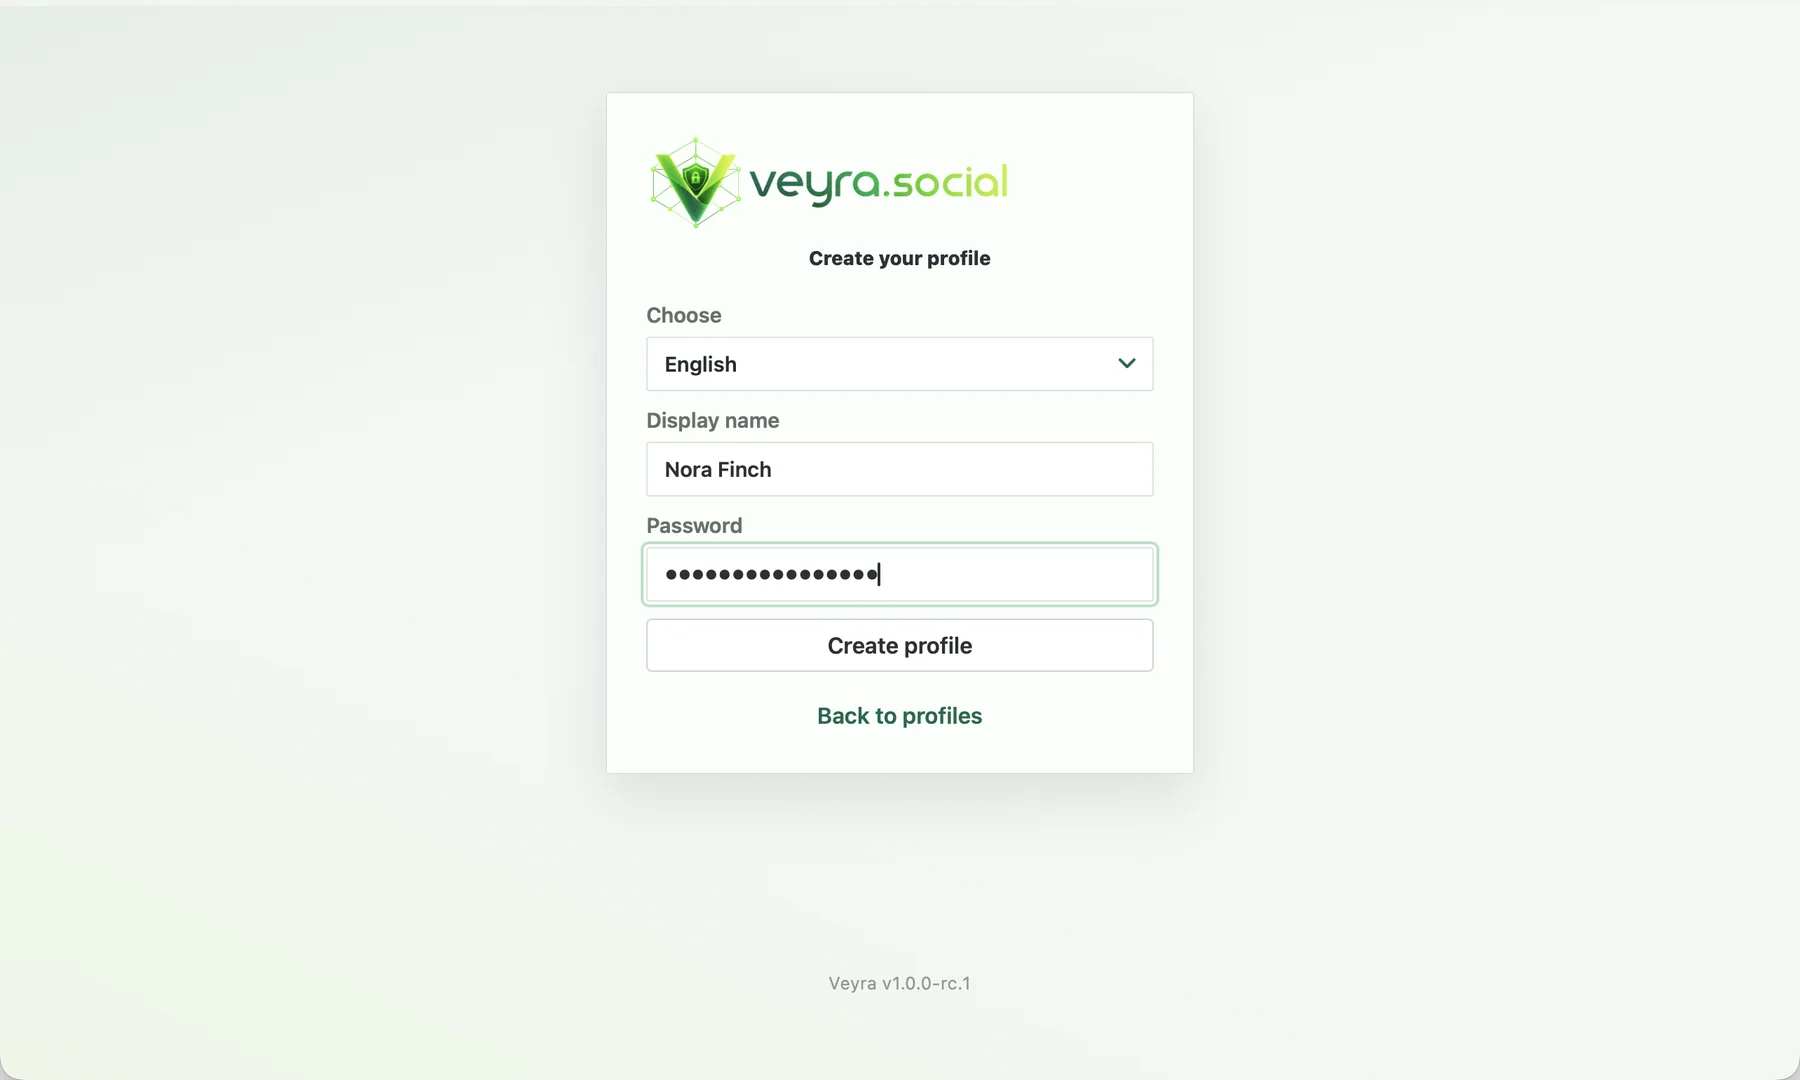
2. Creating a profile
Select the language of the interface, specify the name to be displayed and come up with a reliable password. The name of your contacts will be visible, and the password protects the profile and is used to log in.
Keep your password in a safe place, like in your head (remember it well). Veyra doesn't keep it anywhere and can't recover the lost password. There is no password recovery system.
3. Open your profile and get an invitation
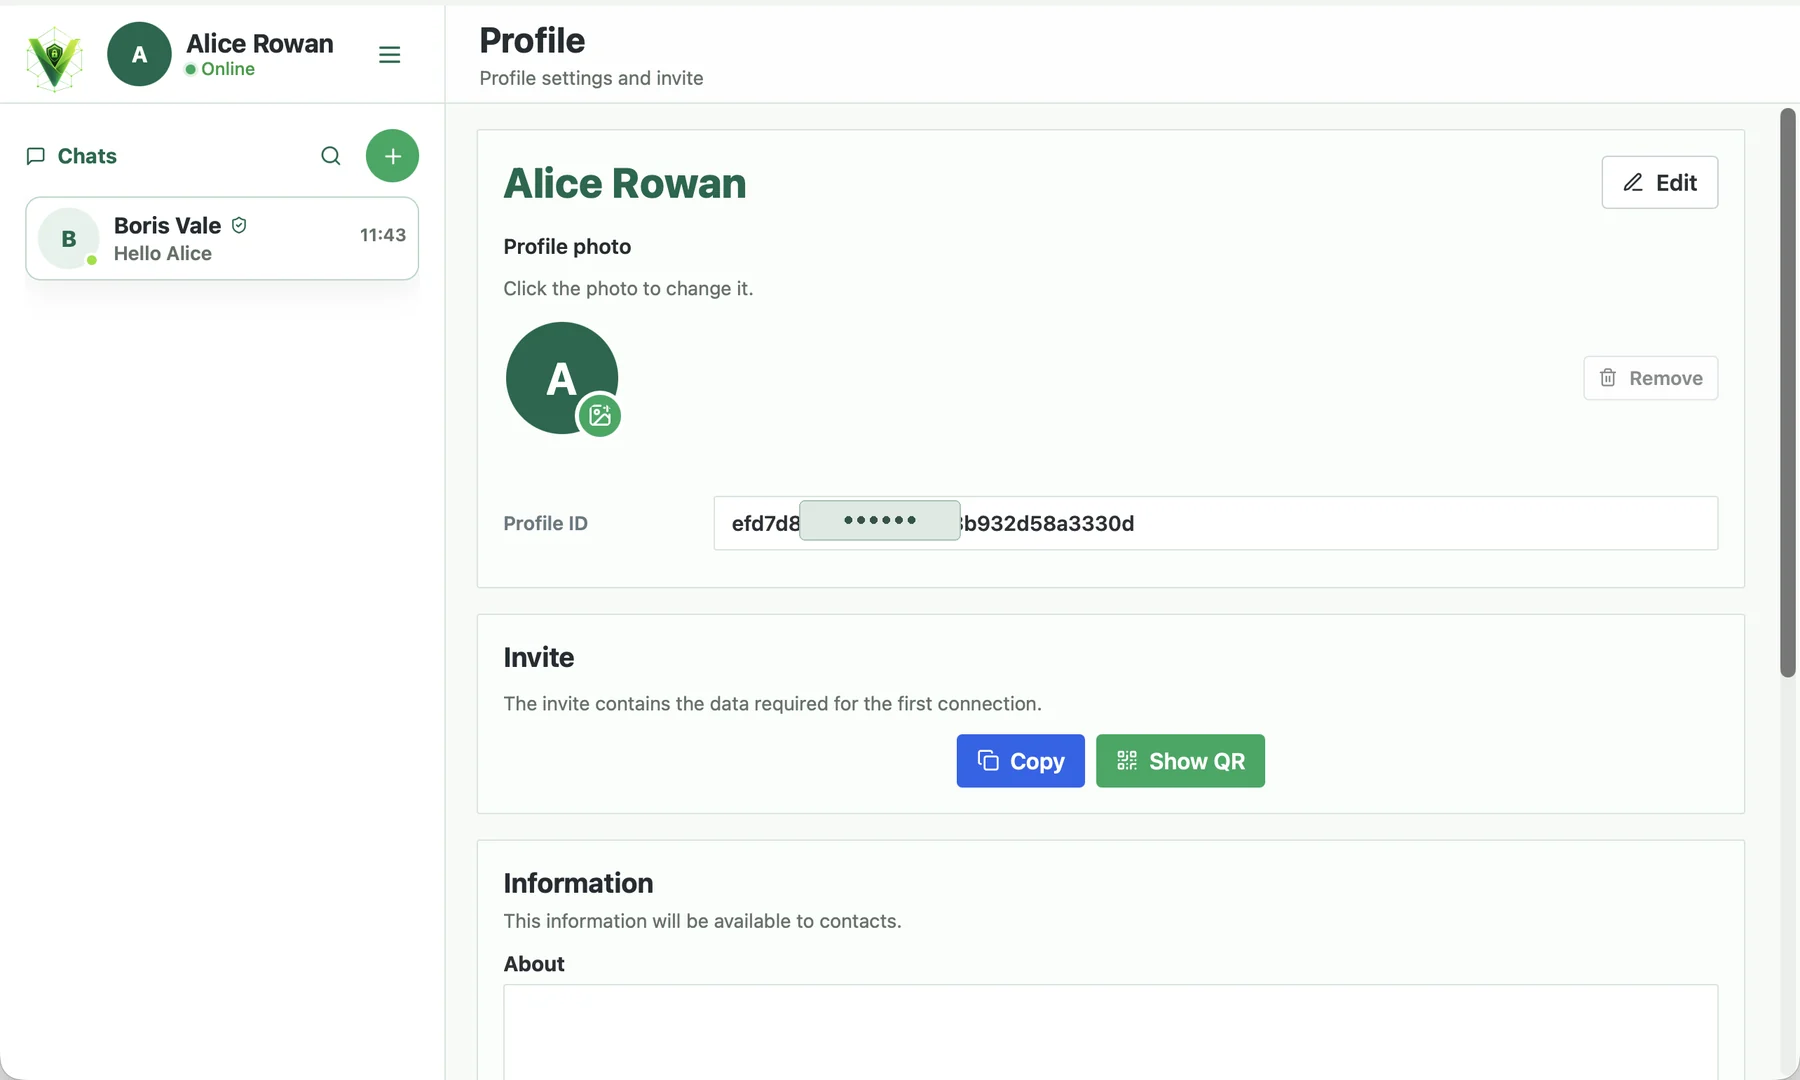
After you log in, open the app menu and go to the profile section. In the Invitation block, there are two buttons: Copy and Show QR.
Your profile ID is displayed on the same page. He'll need another person to verify that the invitation really belongs to you.
4. Send the invitation
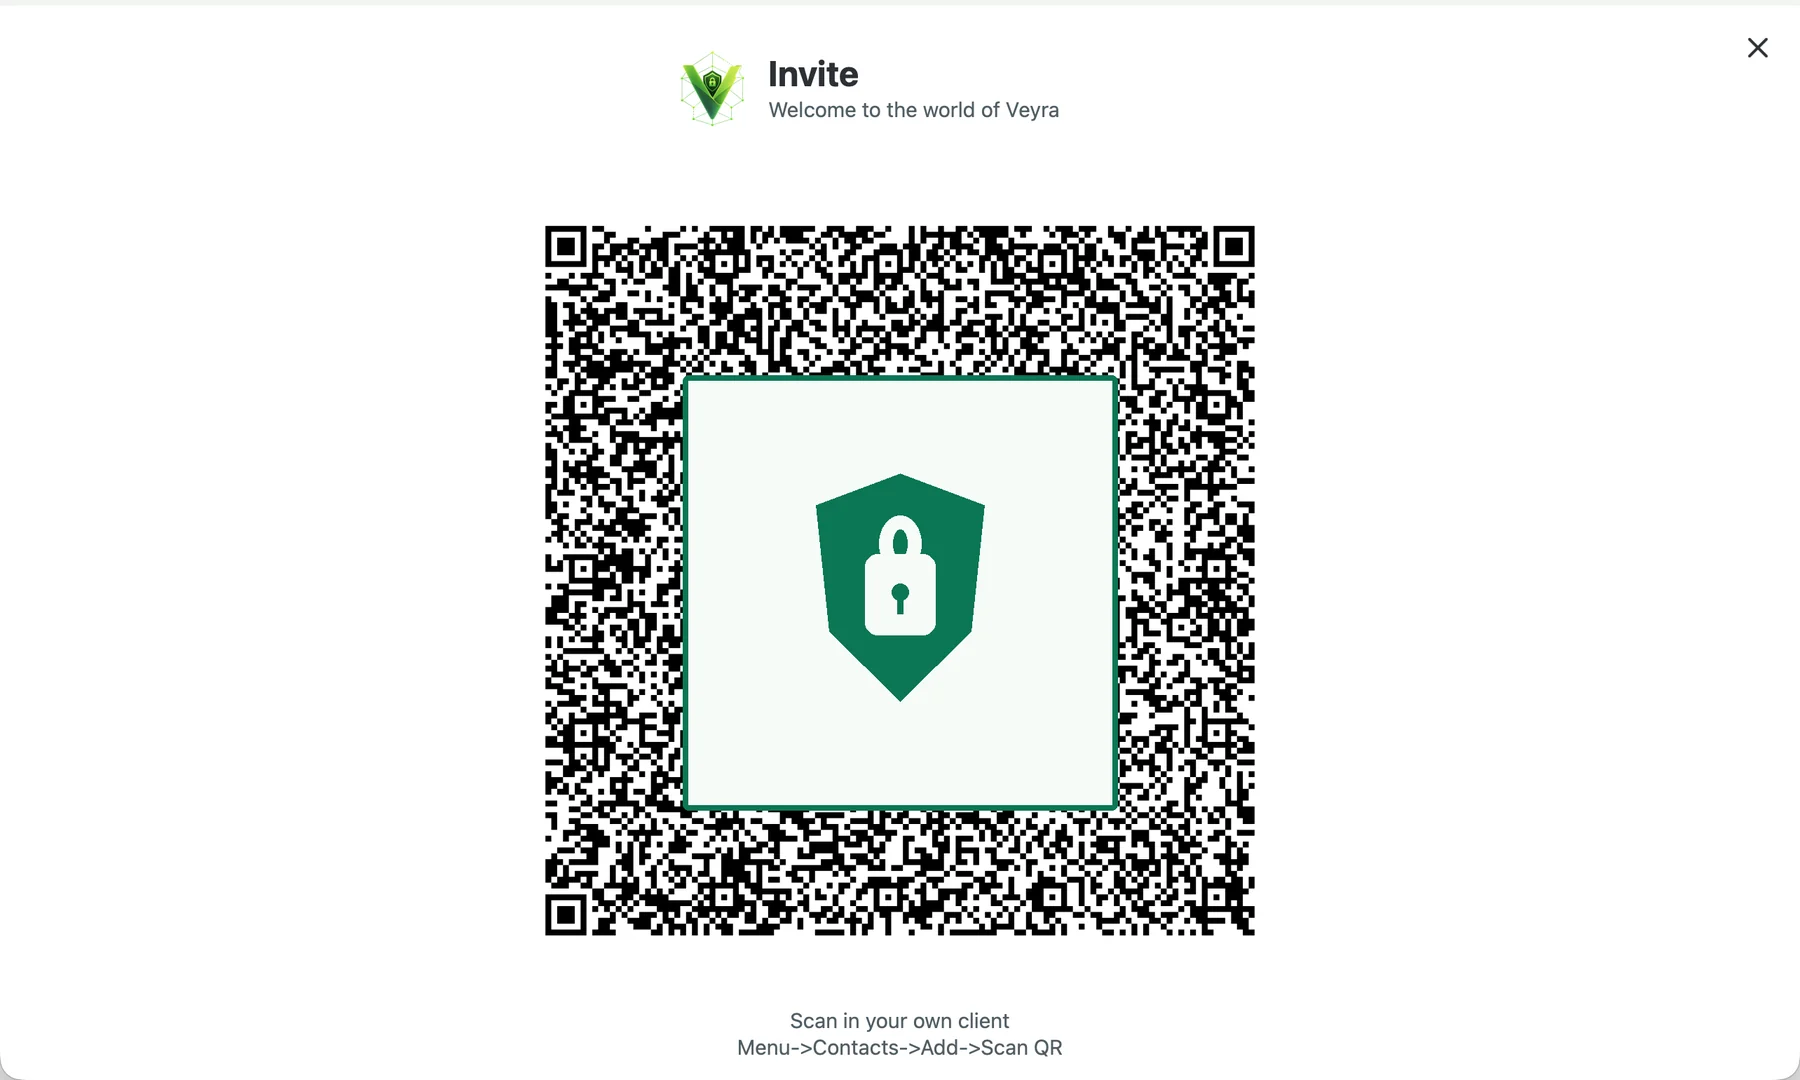
If you're nearby, click Show QR and ask the interlocutor to scan the code. If you connect remotely, click Copy and send the invitation via e-mail, SMS or other means.
The invitation is for the first connection. Do not post it on social media, public chats, comments, or open sites.
5. Add a contact
On the receiver's device, click + in the chat list or the Add button, then type the invitation. For the QR code, select Scan and pin the camera to the sender's screen.
Once Veyra recognizes it, it will display the profile ID and the proposed name. Compare the ID with the sender, enter a convenient name if necessary, and then click Add.
On the phone: If the scanner doesn't open, allow Veyra to access the camera in system settings and try again.
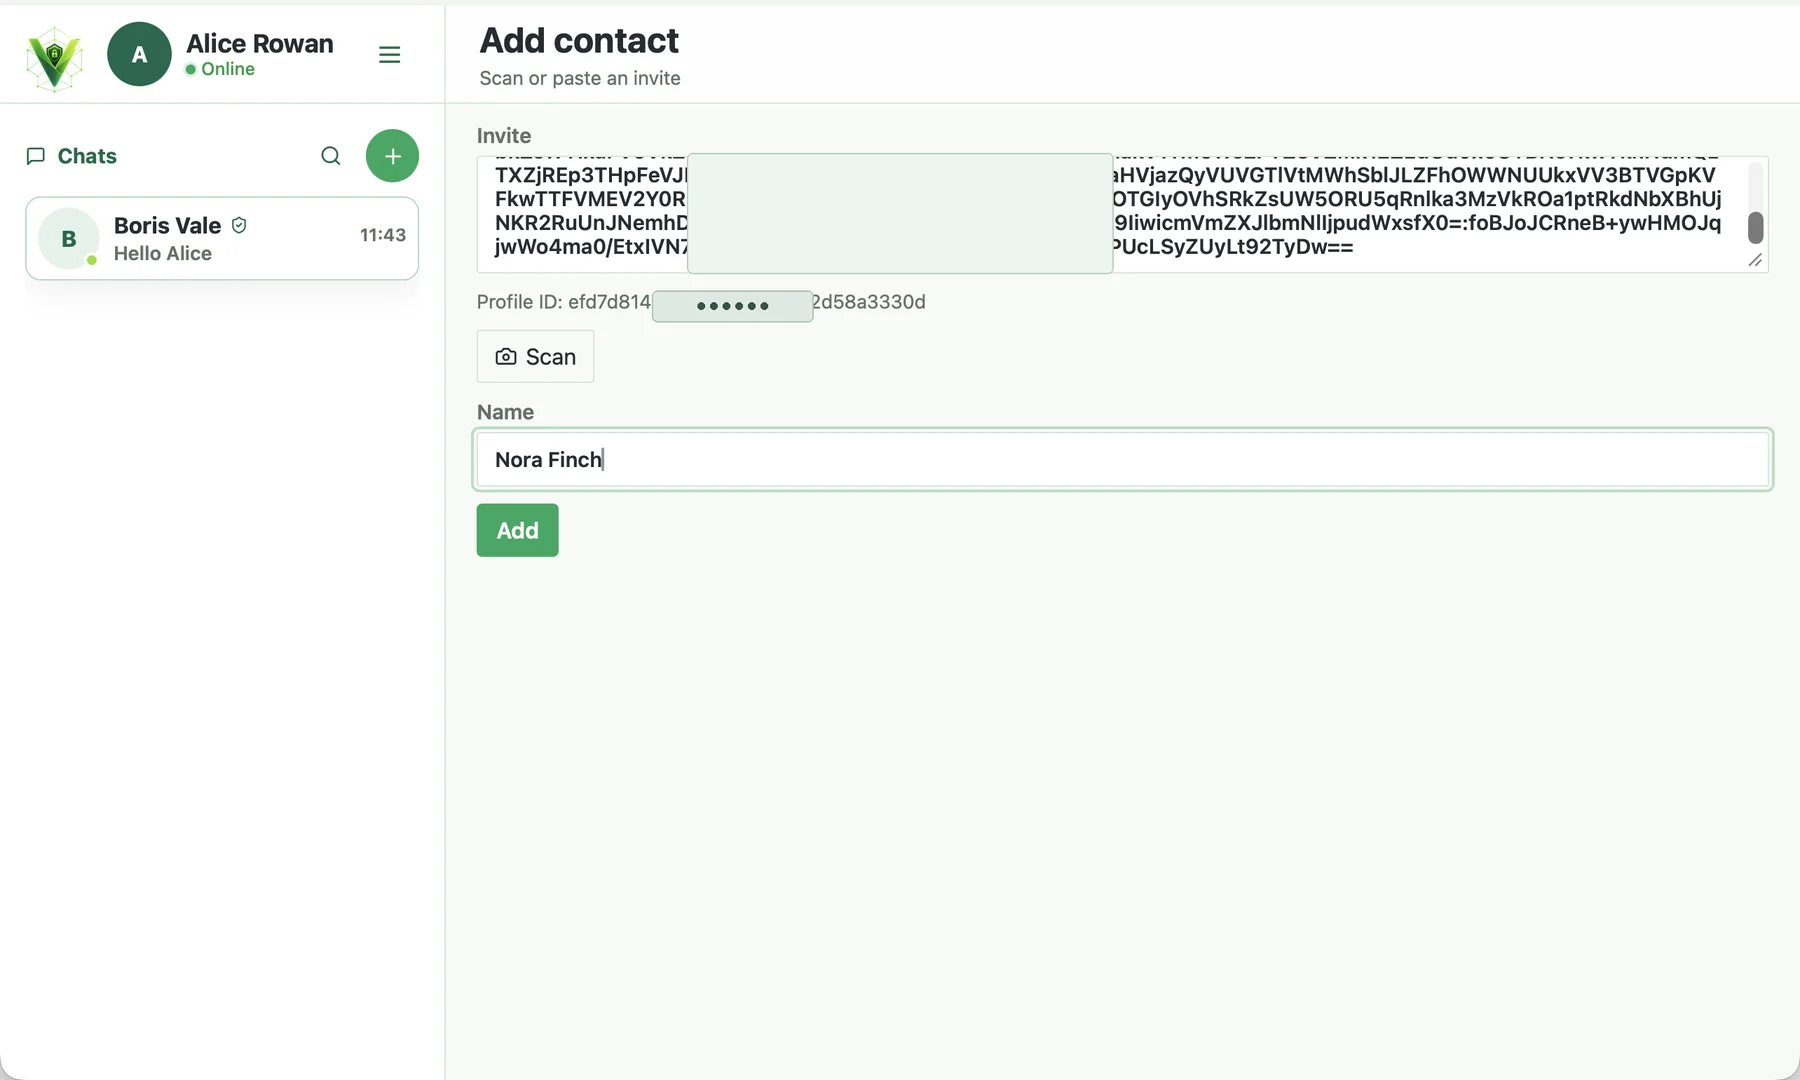
6. Accept the incoming application
The owner of the invitation will have an incoming contact request. Check the name and ID again, then select the action:
- Accept if you were expecting an application and the ID matches;
- ♪ Turn it off ♪ if you don't want to add a sender;
- Lock it off if the application is unexpected or looks suspicious.
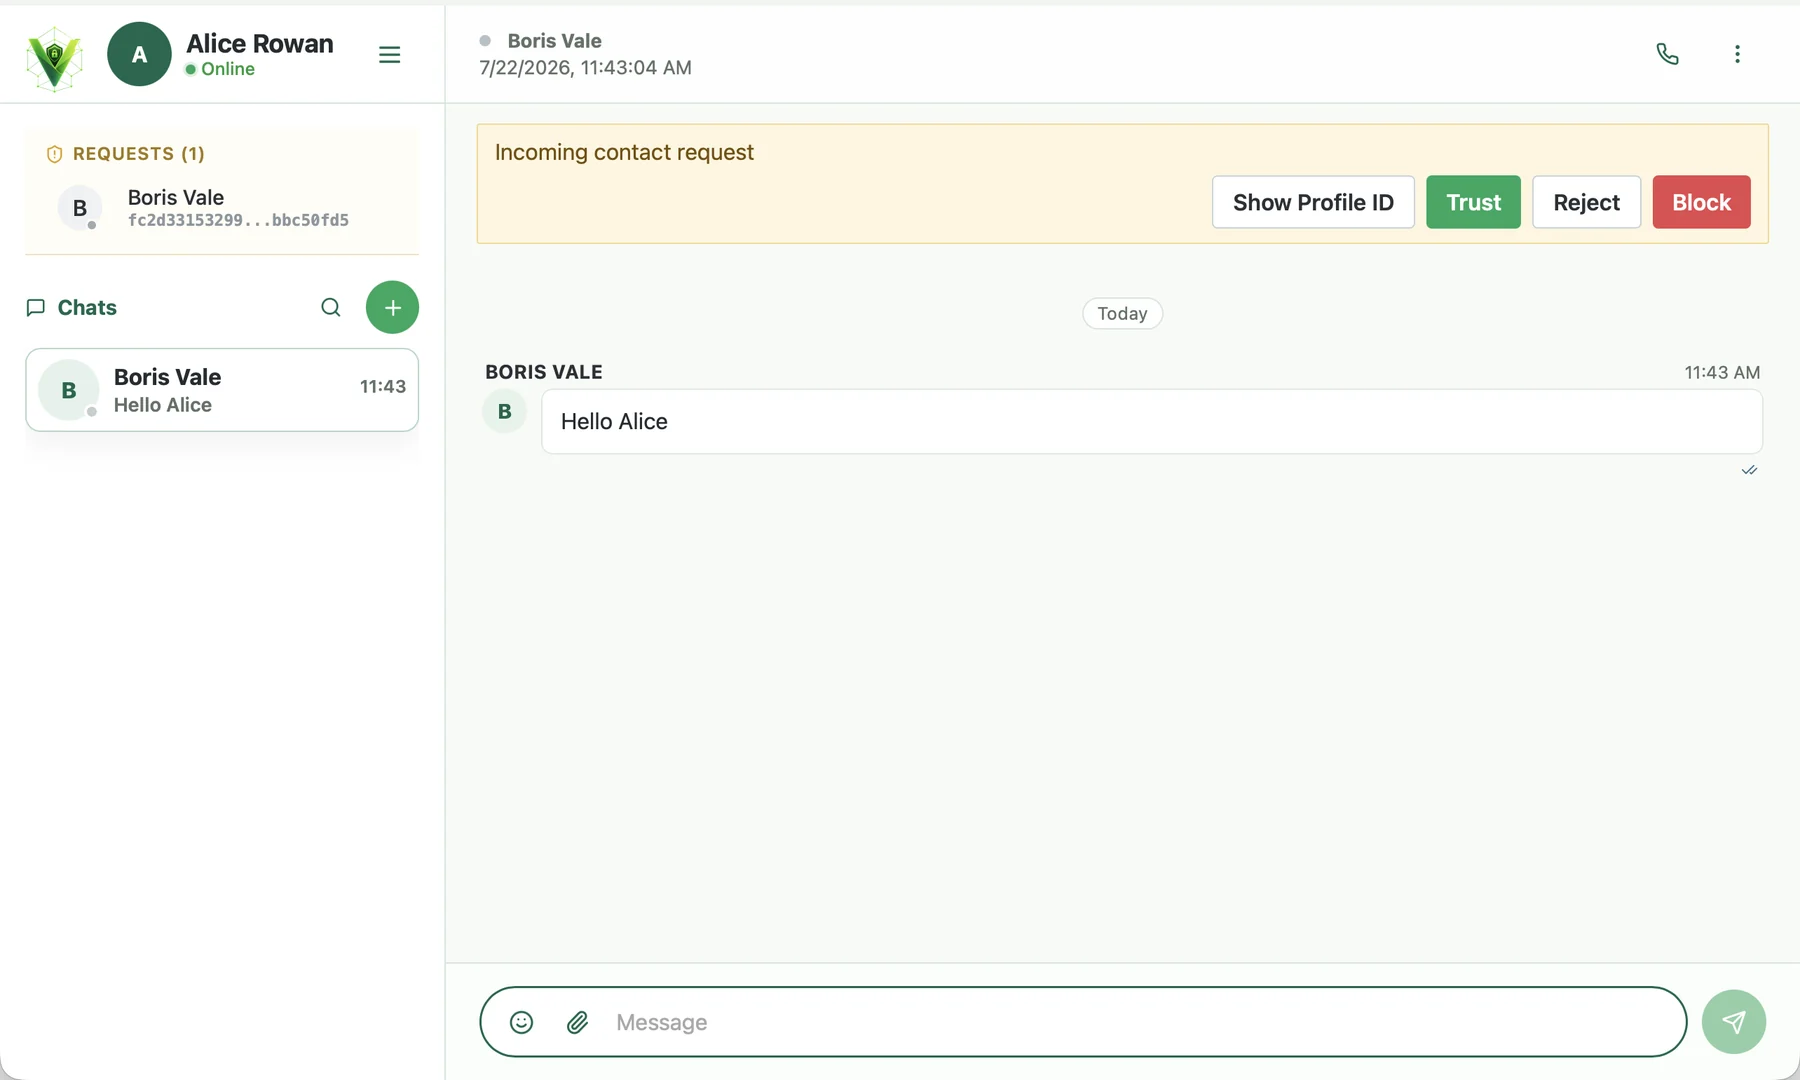
7. Check the connection
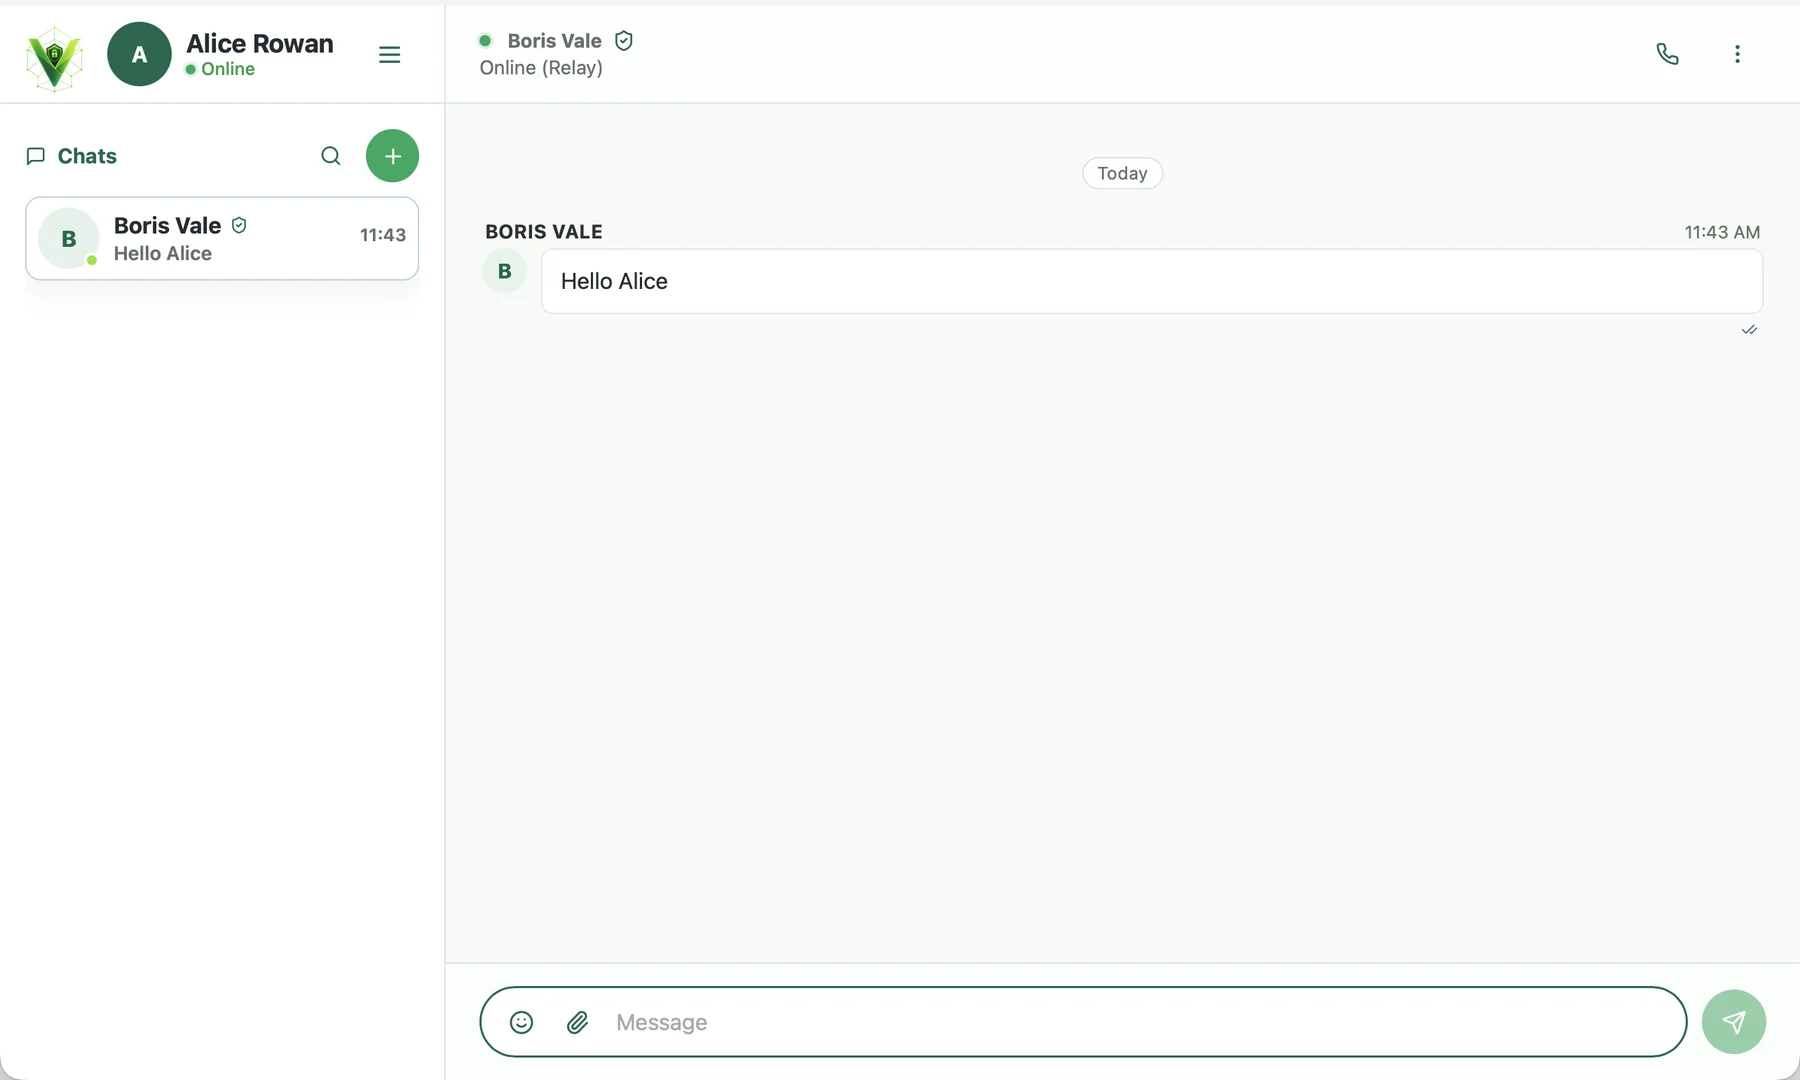
After you add each other, the contact will appear on the chat list. Open the chat and check the status at the top of the window: the green dot and the inscription In the network means that the interlocutor is available.
A current route, such as Relay, may be displayed nearby. The route shows you how to deliver traffic, but it doesn't confirm that you're connected to the right person. So check your ID beforehand. The correspondence remains encrypted, and the messages and history are stored on the participants' devices.
8. If the connection isn't installed
- Check the internet connection on both devices;
- Make sure both apps are running and unlocked;
- update Veyra to the current version;
- Wait a minute: searching for an accessible direct or Relay route can take time;
- If the invitation was created long ago or the network settings have changed, create a new one and repeat the addition;
- If the ID doesn't match or an unexpected request comes in, don't accept it ask for a new invitation.
After a successful connection, you can send a short test message. If it's delivered and the status remains green, the setup is complete.